Usage - v6.4.5.4
To use the Bulk Field Configuration Editor add-on, you have to have administrator permissions.
As administrator, there are two ways to switch to the "Analyse" dialog of the Bulk Field Configuration Editor add-on:Via the "Manage add-ons" dialog. Do the following:
- Via the "Manage add-ons" dialog. Do the following:
- From the Administration menu, select Add-ons.
- In the left column, select Manage add-ons.
- By default the user-installed add-ons are listed in the right frame. The catworkX Bulk Field Configuration Editor add-on should be listed.
- From the add-on list, select catWorkX Bulk Field Configuration Editor.
- To switch to the "Bulk Field Configuration Editor" dialog, click Configure.
- Directly via the System management dialog. Do the following:
- From the Administration menu, select Add-ons.
In the left column, there is a list entry labeled "FCEd Admin Page". - To switch to the "Bulk Field Configuration Editor" dialog, click FCEd Admin Page in the left column.
- From the Administration menu, select Add-ons.
If you have a lot of add-ons installed on your system, the first way can be faster to find the catWorkX Bulk Field Configuration Editor add-on.
The "Bulk Field Configuration Editor" Dialog displays 4 tabs:
- Batch Update
- Export
- Import
- Settings
In the Batch Update tab, select the field you want to modify from the Field pull-down menu. For each field you can configure:
- Whether it is visible or hidden
- Whether it is required or optional
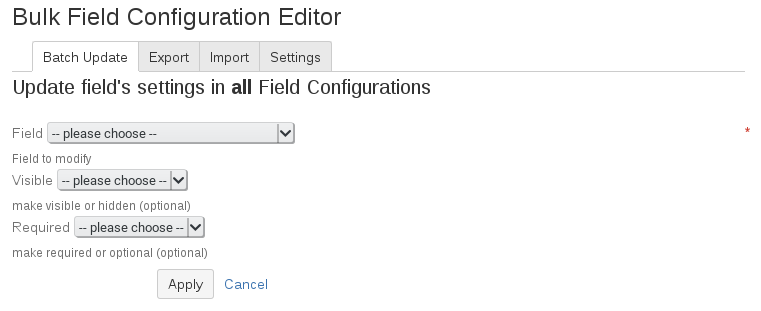
To apply your changes to all field configurations, click Apply.
Use the Export tab, to export the configuration of all field configurations to a Microsoft Excel file.
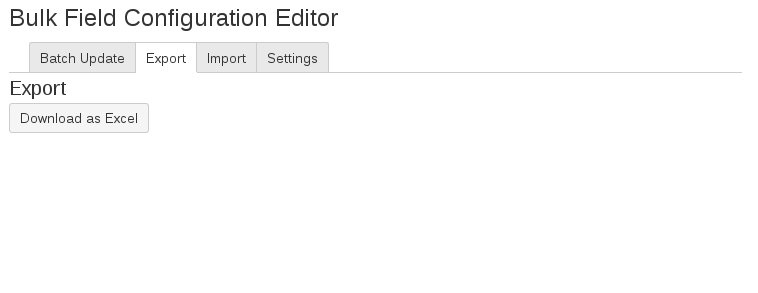
This Excel file can be used to configure your field configurations as described in the Use Excel File for Field Configuration section.
After changing the Excel file, you can import it to change your system's configuration. To do this, open the Import tab, browse for the Excel file and click Upload.
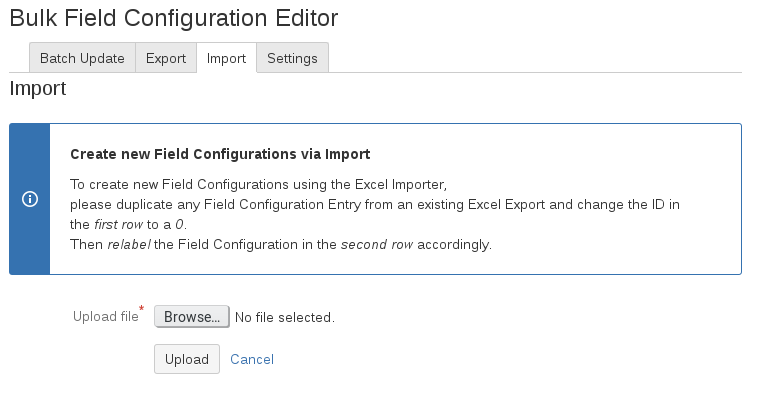
When the Excel file could be imported successfully a confirmation appears.

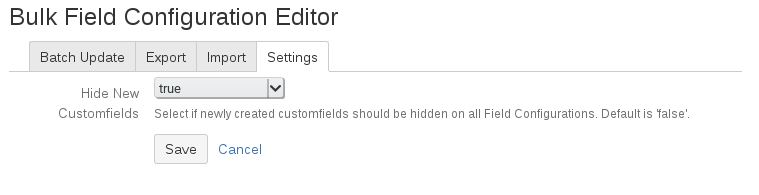
In the "Settings" tab, you can configure the default visibility for newly created custom fields. If you want all newly created custom fields to be hidden, select true from the Hide new menu and click Save.