Creating issues
General information
Once the installation and configuration of the add-in is completed, Jira issues can now created directly from e-mails within Outlook. The following description shows how to create a new issues with just a few simple steps.
Creating issue without mandatory fields
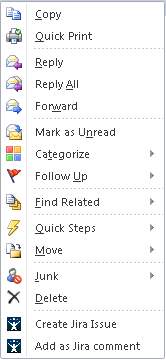
First of all you have to select the e-mail, which shall be processed. Clicking the right mouse button on the e-mail will open the context menu. At the bottom of the context menu you will find a new item called "Create Jira issue".
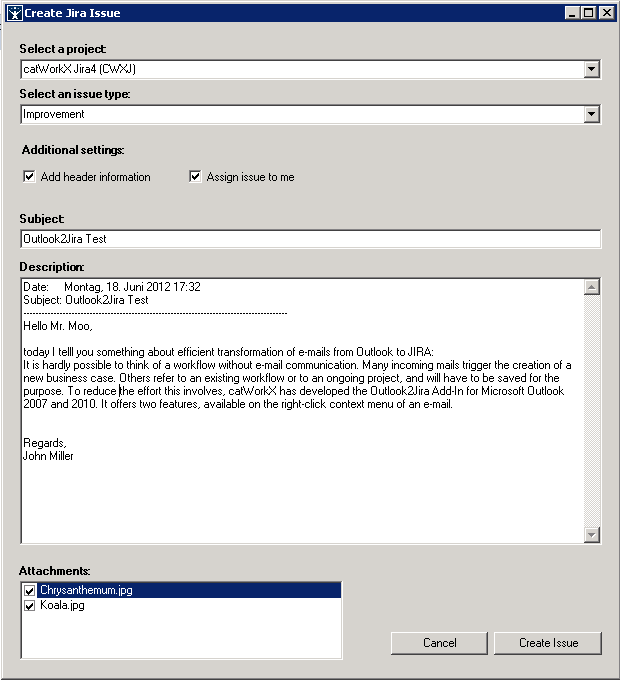
After selecting "Create Jira issue" the following dialog will be shown:
The drop down menu on the top will show all projects visible for you. Please select a project where the new issue shall be created. After selecting the project the drop down menu for issue types will be refreshed. Please select an issue type as well. To add the header of the mail to the description just use the checkbox "Add header information". If you enable "Assign issue to me" the newly created issue will be assigned to you. The summary and description will be pre-filled with the subject and the mail body, but both text boxes are editable. If you select text of your mail body just the selected text will be pre-filled in the desciption field. Furthermore the attachments of the e-mail will be shown. You are able to choose which attachment shall be uploaded. Please keep in mind that the attachments will be uploaded after the issue has been created successfully.
If the field configuration of your project and issue type does not require any further fields, the issue will be created by clicking "Create Issue". In case of success or failure an appropriate message will be shown.
Creating issues with mandatory fields
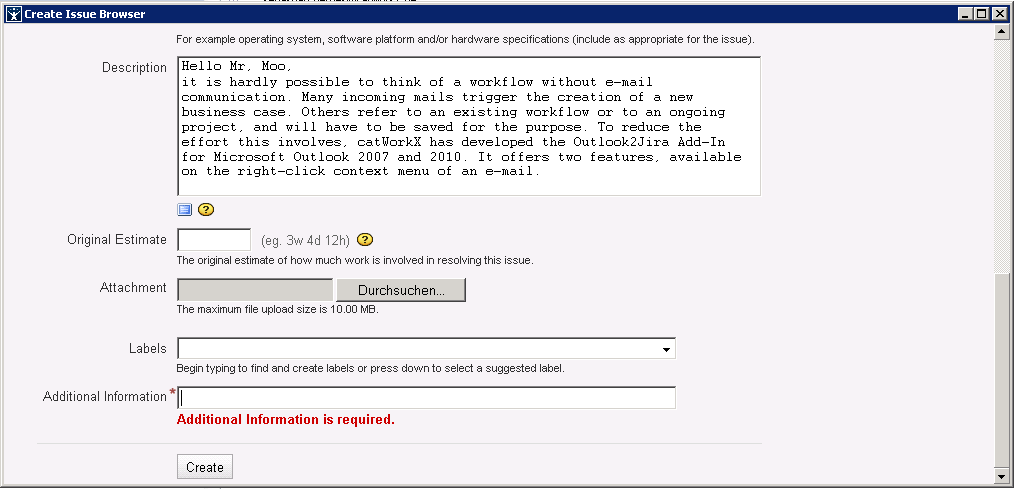
The steps for creating the issue are substantially identical to those described above. The only difference is that add-in recognizes if there are any mandatory fields after clicking "Create Issue" . In this case the project and issue type specifc create screen of Jira will be opened in an integrated browser window, as shown in the following figure.
Now you can complete all missing fields. After that click "Create" at the bottom of the page. To cancel the creation of the issue just close the windows by clicking the close symbol in the top right corner
Note: The attchments will be added not until the issue has been successfully created. That is why they are not shown at the create issue screen within in the browser window. But it is possible to add futher attachments here.


