Mapping

In the "Mapping" module, you can select the custom fields to be displayd in rows and columns of the matrix.
Only single select customs fields are supported for rows and columns.
After selecting the custom field for the matrix columns from the "Columns" menue and the custom field for the matrix rows from the "Rows" menue, a 4x4 matrix template is displayed.

Do the following:
Configure Columns
To add new columns, click the Add Column button at the right of the matrix. At maximum, 8 columns are supported by Matrix for Jira.
To remove a column, click the trash icon next to the column head. At minimum, 2 columns are needed for Matrix for Jira.
The items of the custom field selected to be displayed in columns are available in the column head menu. For each column, select the item that is displayed in the matrix column.
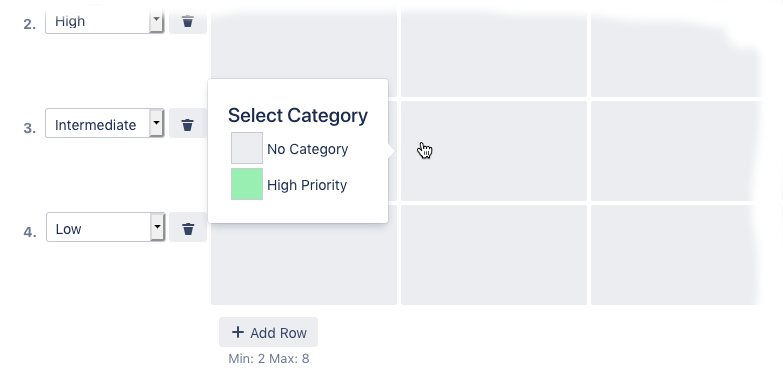
Configure Rows
To add new rows, click the Add Row button at the bottom of the matrix. At maximum, 8 rows are supported by Matrix for Jira.
To remove a row, click the trash icon next to the row head. At minimum, 2 rows are needed for Matrix for Jira.
The items of the custom field selected to be displayed in rows are available in the row head menu. For each row, select the item that is displayed in the matrix row.
Configure Categories
In the "Categories" section of the "Mappings" dialog, you can define colors to be used as cell background. Do the following:
- Enter a name for your category in the "Category Name" textbox.
- Click the color box and use the color picker to select a background color for the cells of the current category.

- Click Add.
The new category is added to the list of categories.
To edit a category, select Edit at the right of the categrory.
To delete a category, select Delete at the right of the categrory. - To assign a cell to a category, click on a cell in the matrix template and select the corresponding category from the pop-up menu.