Use Configuration Wizard
To configure the basic settings for Jira in OTRS, a configuration wizard is available. Do the following as OTRS administrator:
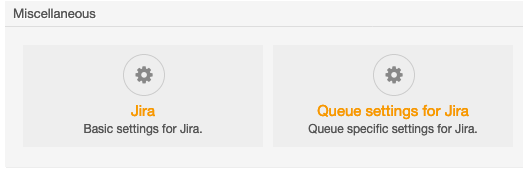
- In the OTRS dashboard, select the Admin tab.
- In the Admin tab, select Jira in the "Miscellaneous" section.
The "JIRA core settings (1)" dialog of the configuration wizard is displayed.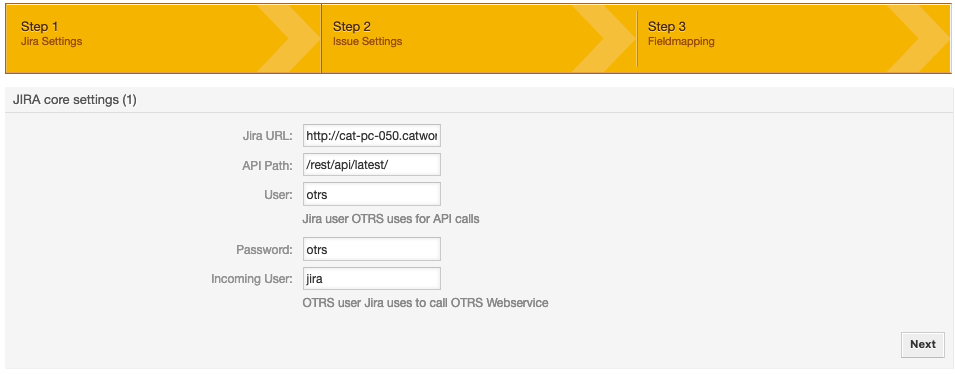
In the "JIRA core settings (1)" dialog, you configure the basic connection settings.
Parameter Description Jira URL Enter the Jira base URL. API Path Enter the path of the REST API. User Enter the name of the Jira user being used for system login.
You have to create this user and assign him the project administrator role in Jira. He must have the "Create Issue" and "Assignable User" permission.
This user must also be specified in the "Special User" parameter in the app configuration on your Jira server.
Password Enter the password of the Jira user being used for system login. Incoming User Enter the name of the OTRS user the Jira app uses for authentication at OTRS.
You have to create this user on the OTRS server. He must have the "Create Issue" and "Assignable User" permission.
This parameter is required for breaking update loops.
Click Next to continue.
The "Issue settings (2)" dialog is displayed.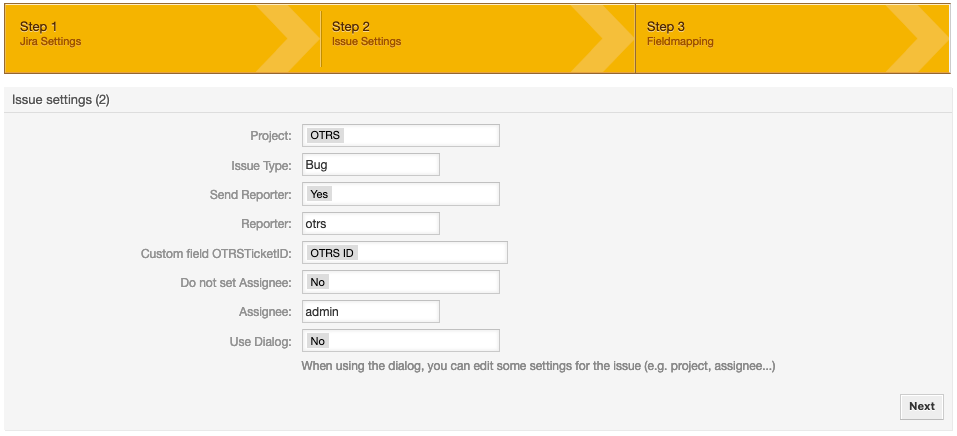
In the "Issue settings (2)" dialog, you can configure the settings for the Jira issues to be created.
Parameter Description Project Enter a Jira project where new newly created issues will be located. Issue Type Enter a Jira issue type being used for automated issue creation. Send Reporter Enable if you want to send the reporter to Jira. Reporter Enter the name of the Jira user who will become the issue reporter when creating Jira issues from OTRS tickets automatically. Custom field OTRSTicketID Enter the name of the Jira custom field that is used to store the OTRS ticket ID. The name has to be selected in the "Customfield With OTRS Ticket ID" in the "Special Field" section in the Jira app configuration dialog. Do not set Assignee Enable if you do not want to send the assignee to Jira. Assignee Enter the name of the Jira user who will become the first issue assignee. Use Dialog Activate this option to display a dialog, when an issue is about to be created. In this dialog, you can edit project, assignee, "automatic" user and issue type. If you set "Use Dialog" to Yes, four more options are added to the dialog.
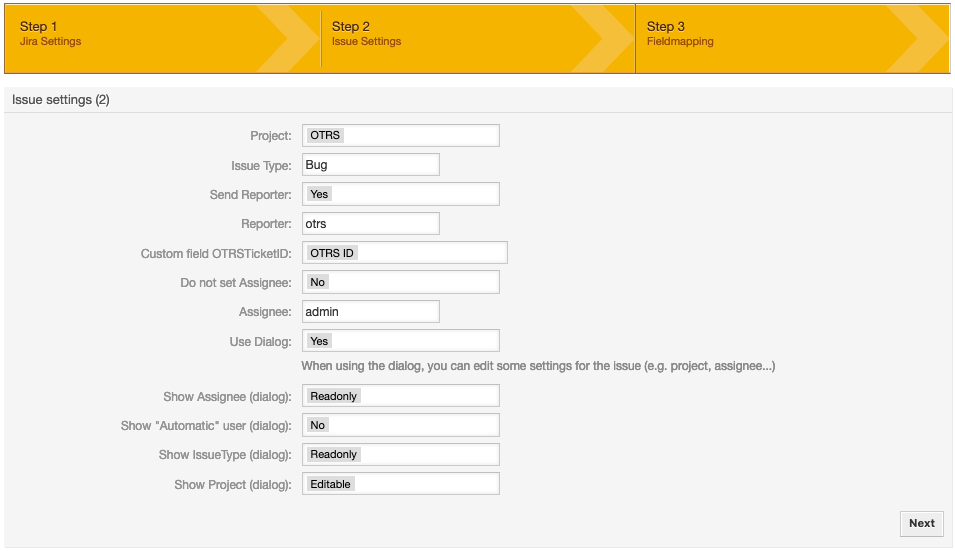
Parameter Description Show Assignee (dialog) Select if you want to display the "Assignee" field. Available options are: - Editable
- Hide
- Readonly
Show "Automatic" user (dialog) Activate to display the "Automatic" user option for assignee. Show Issue Type (dialog) Select if you want to display the "Issue Type" field. Available options are: - Editable
- Hide
- Readonly
Show Project (dialog) Select if you want to display the "Project" field. Available options are: - Editable
- Hide
- Readonly
Click Next to continue.
The "Fieldmapping (3)" dialog is displayed.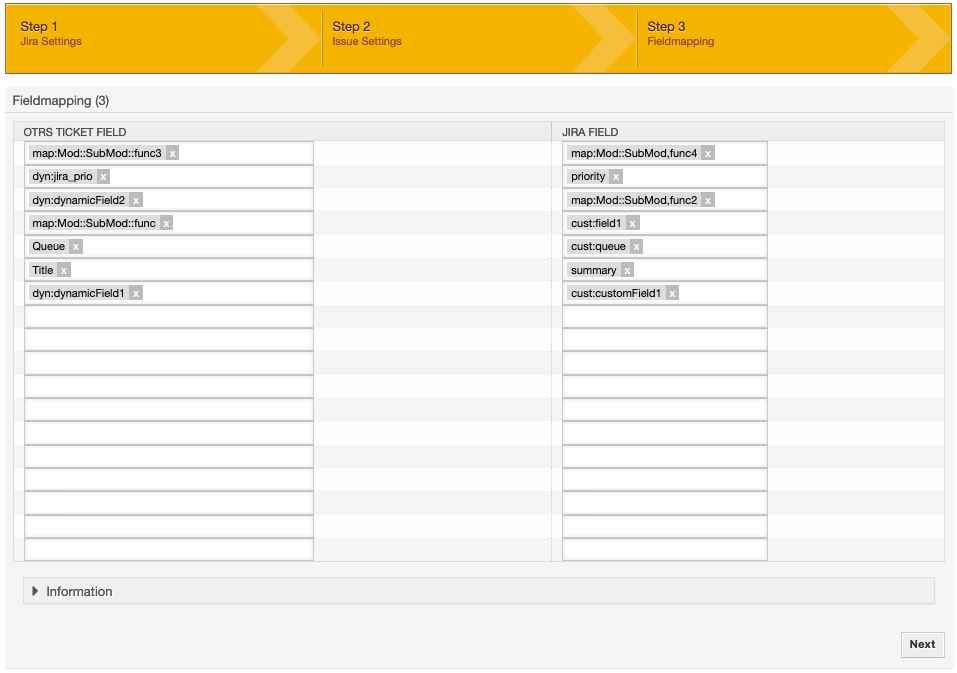
The following information is transferred automatically:
- Project (standard value from SysConfig or selected project)
- Issuetype (standard value from SysConfig or selected issuetype)
- Summary (ticket title)
- Description (article body)
- Reporter (standard value from SysConfig or selected reporter)
- Assignee (standard value from SysConfig or selected assignee)
- OTRSTicketID customfield (ticket id)
- In the "Fieldmapping (3)" dialog, you can map your OTRS fields to Jira fields.
Select the OTRS ticket fields and Jira fields you want to map.
Click Next to continue.
The "Configuration done ()" dialog is displayed.
- Click Go to Admin area.