Add Users to a Project Role
The dialog to add users and groups to a project role is replaced by Restricted Role Assignment.
| Original | with Restricted Role Assignment |
|---|---|
|
|
To add a user to a role, do the following as Jira administrator:
- From the Administration menu, select Projects.
The "Project list" is displayed. - Select the project you want to add users to.
The "Users and roles" dialog is displayed.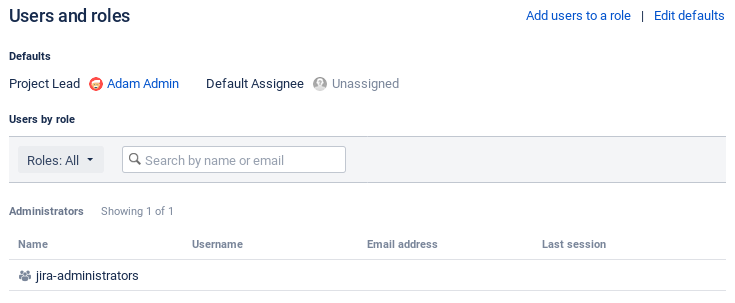
- Click Add users to a role.
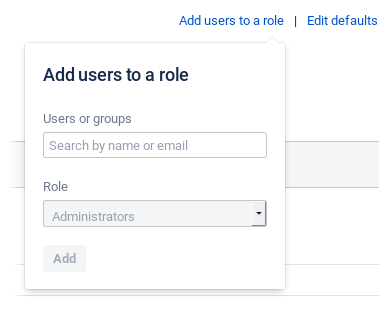
The "Add users to a role" dialog is displayed.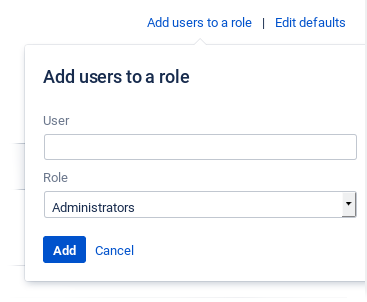
Select the role you want to assign users to from the "Role" menu.
The roles provided in the menu can be configured via the Project Metadata app.
Start entering a user or group name in the "User" textbox.
While entering, the system proposes user and group names.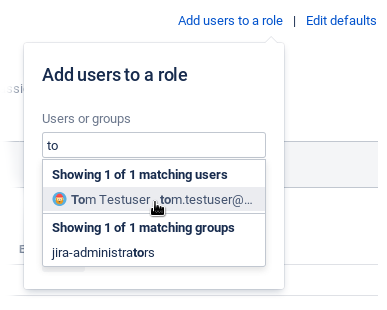
Only Jira administrators are allowed to select groups here. Project administrators are only allowed to select users here if selecting users has been permitted in the settings for this app.
Select the user (or group) from the dialog.
Repeat this step to select further users (or groups).Even if you do not have "Browse Users" permission, you can select users here by entering their exact user name.
- Click Add.
The selected users (and groups) are added to the "Administrator" list in the "Users and roles" dialog.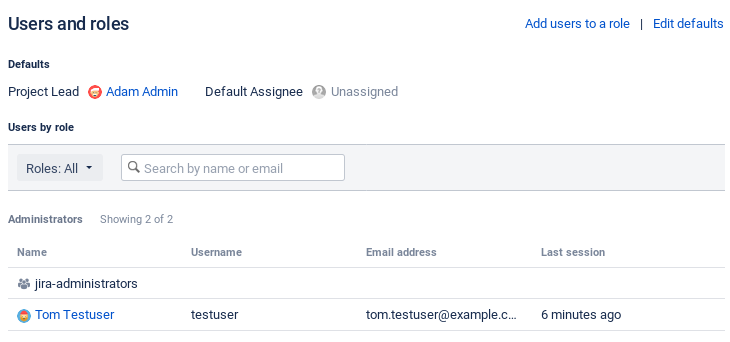
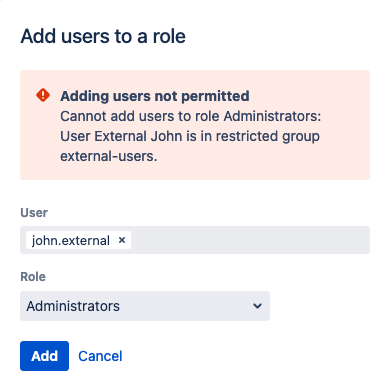
You will get an error message if it is not permitted to add the selected user or group.
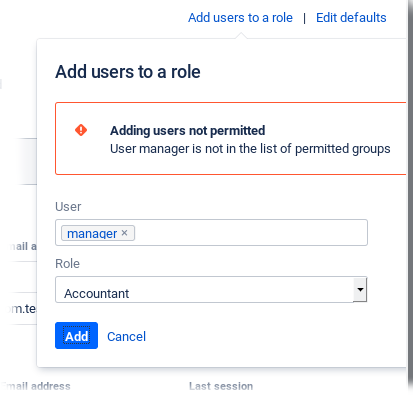
The permitted groups are configured via the Project Metadata app.
You will get an error message if the user to be added is member of a restricted role and can only be added to specific roles.